Enough for the introduction (LOL). Want to look cute or ulzzang? Or maybe look like these popular Korean girls/girl group like Sulli from F(x). It's very easy to make, but if you're lazy to do it yourself or you lack creativeness or art/DIY skills, you can always buy one. I'm not discouraging you guys :'( so please, don't hate me for those reasons nor am I advertising products here -n-.
Credits to GOOGLE :)
So here are the materials we need in order to make your Nekomimi (Japanese word for Cat = Neko, Ears = Mimi so Cat-ears = NEKOMIMI. Lol, so it's nihonggo time!) LOL, you might get confused because this is a Korean fashion tutorial yet I inserted Japanese words for this. *Sorry, I always inject my "japanese" side in everything ._. No, I'm not Japanese too. I just love Jap-culture <//3*
- Old headband
- Metal Wires (at least 12inches = 1ruler)
- Glue gun and Glue sticks
- Ribbon (2 yards. Color of your choice)
- Patience and enjoyment *u*
Steps on how to do it.
1. First, cut your metal wire for about 6 inches. *This depends on how big or small your ears' length to be.* Make 2 pieces of me. I forgot to take a photo of the 2 straight wires so I'll post a diagram instead. Then after that, fold it in half and shape it to your desired cat-ear shape. Leave some excess at the end of the wires because it will be the part to be glued on the headband. Here's the photo.
2. Place the metal wires on the headband, make sure that you put it in the higher part of the headband so it will be noticeable. :) Don't put it too high because it'll look like devil horns >.<
3. Pre-heat your glue-gun so it'll be ready for the sticking process. When it's ready, put a small amount in the head band, with same size of the wire, see the photo for reference, then put the wire over it. Repeat this step until all the ends of the wire are glued to the headband. *Careful! The glue-gun is hot, so if you need help don't hesitate to ask someone to help you with this. :) *
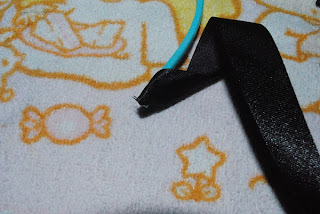
4. After sticking everything in, place a black ribbon at the end/edges of the metal wire. *Question: Why do we need to do that? Answer: IMO, I do this so the gluestick and metal wire won't be visible. Sometimes, even though you already covered it with black ribbon, some stubborn glue and metal wire would stick out. >.< But if you don't think it'll show up, you can skip this part :D*
5. Put a small amount of gluestick at the end of the headband then stick the ribbon. This is the start of the covering process. Roll the ribbon from the end, going up the metal wire until you covered up the whole headband. REMINDER! If you go straight to the metal wire, you will end up leaving the spot beneath the wire uncovered. In order to cover it, just start another covering process at this part. *I have a horrible explanation [.-.] Just read the step 6 to understand it </3*
6. This part was uncovered because I went straight to the metal wire rather than covering first the whole headband. *Q: Why didn't you covered the whole headband first before doing the metal wire sticking process?? A: I dunno, because it'll be faster? NAAAH. :))))* I did it so the headband won't be thick because of the ribbon =.= and the glue and metal wire would just mess it up if ever I did some mistakes >.<
7. After you covered everything, just put another amount of glue at the end of the headband to make sure that the ribbon will stay in place. :)
8. TAKE A LOT OF PHOTOS :)
That's the end of the tutorial. Hope it helped and give you a lot of ideas. Please send me some of your photos. <3 Thank you~


it looks so cuteee :3
ReplyDeletei hope that i'll find some time to try and make that headband :)
Send me a photo once you made one. <3 Thanks for reading. *u*
DeleteTadaaah ! I wanted black one, but couldn't find any black ribbon -_- So I used my old leggins xD This is not perfect and I laugh at myself everytime I see it xD I really don't have any artistic talents :D
ReplyDeletehttp://i1055.photobucket.com/albums/s513/Paryzanka/DSCN5845_zps8a783c27.jpg
http://i1055.photobucket.com/albums/s513/Paryzanka/DSCN5852_zps8f2bce60.jpg
:)
I can't wait for another tutorial :D
Ngaw, it's super cute. <3 Sorry to reply late. I was busy doing some school works, I'll post a tutorial this weekend. <3
DeleteHope you'll like it. :D