Monday, August 12, 2013

Wig Review No. 1: Doll Wig

Hey guys! This is my first wig review though I have been cosplaying for years already. "OTL

I really love wearing wigs since I can't dye/color my hair with different shades and I can't style my own hair since it has life on its own. Well literally, when it wants to be straight, it's really straight, when it wants to be curly and wavy, it's curly and wavy. So yeah, alive hair. *Medussa? YIKES!*

Lately, I've been seeing many posts of different people from a cosplay page wearing these cute wigs. I really like it since it gives you this 'doll like' effect. I admire dolls with really long hair and shiny and curly and *nosebleed* :)) And when I saw one of my favorite shops online who sells wigs **DRUM ROLL... DUN DUN DUN DUNNNNNN~ ** I bought one immediately. Ow, btw, the shop is Kawaii Hayari :D

Here's how the wig looks like. :) 
Left: Original Photo                 Right: Actual Photo

REAL DEAL BEHIND THE DOLL WIGS

Big color difference huh? Yeah, that's just my problem when it comes to buying wigs. Some shops would actually say that it's just because of the computer's display settings, but I dunno, the color I usually get from wig shops are way too light than the reference photos posted on their websites or pages. I think it's some kind of disappointing when you receive wigs that aren't that similar to those posted photos. Sometimes I feel kinda 'deceived' because it looks too perfect but when you have it, it's like "What the f*ck?"

Well, my problem is just the color. Good thing I didn't buy the styled ones like those GOLDILOCKS CURLY CUTE WIGS that they have. =w= I might burn them to death if they give me loose curls or super different wig from what I saw from the site. *I just get quite violent if I get disappointed, so be careful. LOL*

VERDICT:

Thickness: 4/5
It's quite same as the ref. photo. Well, it's not too thick not too thin.

Softness: 5/5
Really really soft =w= And it's really easy to comb and manage!

Shininess: 2/5
No, it's not really shiny. Doesn't really look synthetic at all.

Color: 3/5
The wig looks like Dark Brown + Ash Blonde in the ref. photo. But in the actual one, it looks more like Chocolate brown and Yellowish Blonde? Way too light ._.

Style: 5/5
The bangs are good, the body is good. Since it's straight, I have no other questions in the styling.

FINAL VERDICT: 4.5/5
It's ALMOST perfect. But we should always remember that, nothing's perfect :)) And I guess the color is just one thing that makes this wig imperfect. And by the way, some Filipino cosplayers use this term "cancerous" to wigs. Cancerous means if the wig strands fall from the wig while your combing it or brushing it. No >.< It's not cancerous at all =w=

Here's some other photos of me and the wig, imitating the 'styling' from the shop. :) Excuse my eyebags and uncolored, untrimmed, thick brows. And also if I'm not as pretty as the real model there. HAHAHA! No makeups at all, sorry ._.

LOL. I feel like shit while doing this. Pigtails and ribbons :))))

And say hello to those brows and shiny forehead! Can you see your reflection from my forehead?

Do you also have wigs? Comment and share your thoughts about your wigs too!


Maybelline's BB Cream - Clear Smooth 8-in-1 Review


Yeah, that's just me literally dancing like crazy.

Anyway, here's another review about Maybelline's BB Cream - Clear Smooth 8-in-1~

What's a BB Cream anyway?

BB cream stands for blemish balmblemish basebeblesh balm (apparently because of a trademark in Korea on the word "blemish"), and in Western markets, beauty balm. It is a cosmetic item sold mainly in East and Southeast Asia, although larger beauty brands are increasingly introducing BB creams to Western markets. *Thanks Wikipedia for this information. LOL*

I discovered BB Cream few years ago because I idolize lots of Korean artists, mainly those girl groups and some boy groups too. One of those girl groups is Girls Generation, who are awesomely popular worldwide! *geez banana, if you don't know them, where the hell are you?* They use BB Creams to look flawless and smooth skin. I literally envy Korean people because of their skin *T____T* but not all of them =w=

BB Cream also helps moisturize the skin and give that skin glow and fairness. It helps hide blemishes caused by pimples and other imperfections in our faces. It's like magic, it gives you this baby smooth skin and gives that fairness, that's why some call it "The Magic Cream".

To start with the review here's how it looks like:


It's 18mL, and cost me around P250.00 or around (5.00 USD). I bought it from a local drug store (Watsons).

This BB Cream promises to:

•High UV Protection (SPF 26, PA+++)
•Evens skin tone
•Visibly lightens skin tone
•Smooths pores
•Corrects the appearance of dark spots
•More hydrated skin
•Conceals imperfections
•All day coverage, long lasting
 Then here's a swatch to see the color comparison to my skin.


The first photo has flash, the second no flash. Last photo, I blended it already :D You can see that it's not that noticeable but it really did soften my skin. Sorry I dun have a photo with flash with the blended one, it's too bright. *fail photographer ._.*

What I like about this product:
Covers blemishes \o/
Feels light to the skin
Small and Compact (fits in my bag/pouch perfectly)
Easy to blend
Smooths out and makes my skin soft

What I don't like about this product:
It's messy packaging
  • It's really important to me that the packaging is clean and mess-proof :/ I think it's a waste of money since the product spills off like this and stick to the cap/cover.
  • Not for all skin types, sometimes I have oily face. For oily faces, this cream stays for 2-3 hours only and since Philippines is humid like **** people usually sweat like pigs (LOL) and look like they went out of the pool. I think it's really best to wear this with primer so it'll stay better. For dry skin, it moisturizes your face and keeps the 'dewy' feeling for about 5-6 hours. 
  • Have only 2 shades (01 Fresh and 02 Natural) I used natural since I have this "morena" color, I don't want to look like a geisha LOL! More shades for those who have darker complexions =w= not all makeup users are fair and have 'light' skin. We live in a tropical country so some are more "kayumanggi" in color.
  • Bit low SPF for tropical countries like Philippines, some BB Creams have SPF50 which is really great. I think this BB Cream should be used indoors =w=
  • CAN CAUSE PIMPLES OR IRRITATIONS FOR SENSITIVE SKIN. Yes, I did EMPHASIZE this one because it really did. :( I had 3 zits the next day I used this Maybe you didn't clean your face thoroughly that's why! But no, (yeah that's my other self talking). I just thought of it at first, but the next time I used it, here comes the zit again. Some friend of mine did have irritations caused by this product.
VERDICT!~

COVERAGE- 4.5/5
Good to cover dark spots and blemishes :)

MOISTURIZING FACTOR- 4/5
Did quite a good job for me since the weather nowadays are quite nice. Not too hot, not too cold.

COLOR/SHADE- 3/5
More shades please =w= But yeah, it gave my skin perfect color combination/shade.

HYPO-ALLERGENIC- 2/5
REALLY PISSED ME OFF >w< Pimples after usage. I have sorta sensitive skin but yeah the product is good enough tho. \m/

PRICE- 4.5/5
VERY AFFORDABLE, for students like me.


OVER-ALL VERDICT: 3.5/5

Am I gonna buy this product again? Not now. =w= I have to get rid of the pimples first. I don't hate the product but I just don't like the 'after effect' of it's usage <//3


What's your thought about Maybelline's 8-in-1 BB Cream? Do you like it or not? Any similar experiences?
Comment and share your thoughts and ideas.


Monday, July 29, 2013

Maybelline's Baby Lips Review (Energizing Orange)

Dun dun dun duuuuuun *drum roll sound*

Last time I posted, I said that I'll be posting another DIY. But then, I caught fever and colds so I wasn't able to make it on time. Instead, I'll just be posting a review about Maybelline's Baby Lips (Energizing Orange).

Here in the Philippines, the weather is normally humid or scorching hot during afternoons. High and low temperatures tend to dry up our skin which draws out the moisture in our body. As for the lips, it makes it a bit chappy or flaky. In a way to retain moisture, lipbalm is used. :) *Read the very last part of this review for a MIND BLOWING TRIVIA*
Thank you Google for the picture! (79.00Php ~ 2.00USD)

According to the Maybelline website, these balms are described as follows:

No more basic lip balm 
Lip renew formula and 8-hr hydration for visibly renewed lips in 4 weeks. 
Clinical care for baby-soft lips.
Reduce fine lines and increase elasticity and suppleness in just 1 week!


DUN DUN DUN DUNNNNN~ Here's my verdict:

Pigmentation: 4.5/5
Uhh, seems normal like other lipbalms. This one has no particular shade unlike the others. I was expecting it to be like orangey in color but, naaah, it's transparent. 

Texture: 5/5
Glides easily. It's not heavy nor waxy, unless you put half of it in your lips on one time use ( = w = '') The greasy feeling is normal. Just apply lightly or delicately not heavily.

Flavor / Scent: 4.5/5
Normal orange scent. Nothing special LOL! It reminds me of a department store here in our country. But I have to admit, it's really energizing everytime I smell it. As the product's description, it's Energizing Orange and we all know that citrus scents are naturally refreshing.


Will I buy this product again? DEFINITELY. I'll try the others too.


From Left to Right:
Energizing Orange - Smoothing Cherry - Anti-Oxidant Berry - Relieving Menthol


**TRIVIA ALERT**
According to Wikipedia (though the source was quite unreliable, just wrote this to put some interest and it's quite worth it to do so. HAHA!) 

"Lip balm was first marketed in the 1880s by the creator of ChapStickCharles Browne Fleet,[5][unreliable source?] though its origins are commonly traced to earwax, which was used as lip balm prior to that.[6][unreliable source?]"


Now you know! When you run out of lip balm, just use your finger to gather some earwax then use it as lip balm. LOL!! Just joking. That's overly disgusting and YUUUUUUCK! Thank you to the unreliable source, you just gave me a dark and evil plan. KEKEKE~ Thank you for reading. Yeah I know it's not mind blowing, just a random thought. HAH~


Like lip balms too? Write in your comments and share your reviews too!


Monday, July 15, 2013

Teaser Photo for Next Tutorial

Yo! Here's a teaser photo of my next tutorial. :)

Can you guess it?

It's just a Google generated image :) Haven't started making it. Keep posted friends! <3

Blessed Monday

Hey yo! This is not a post about any reviews or tutorials. I just wanna share something to you guys, tho not everyone's concerned to read this shit  "whatnot" post.

So yesterday, July 15, 2013. I was walking out our college building, when suddenly I noticed a kitty purse. It was the same as the one that I've lost last June 17, 2013 (first day of class bad luck. IKR!) while I was about to enter our class. I thought it was lost, or someone might have picked it and ran off somewhere and bought something from my money, gamble or whatsoever they want to do with it. BUT~! Yeah, some GOOD guy, I literally dunno if he's or she's, surrendered it to the guards of our colleges.

My friend told me to ask the guards about it but I was too hesitant to ask because of my shitty thinking. In the end, I still asked them. Luckily, the money was still in there! As in, WALANG NABAWAS! Overly happy girl mode *insert random jumping girl here* I was so happy because the money inside that purse was my dormitory rental fee.

LESSON LEARNED: Learn to trust the people around you. Don't be super judgmental. And always ask.

To the person who returned or surrendered my kitty purse, I don't know how I should express my sincere gratitude and thanks to you. :) Wherever and whoever you are, may the force be with you and God Bless you.

To God, thank you for your never ending blessings. And sorry for being rude to other people. I should not judge them but trust them.

Message to Readers: Love your neighbors as you love yourself.


Thank you for reading. :) I love you all! <3

Wednesday, May 22, 2013

DIY Paramore Renegade Shirt

Here's another DIY project specially to those PARAMORE FANS \m/

I was inspired to do this shirt right after I watched Paramore's concert here in the Philippines (Thrilla in Manila 2). I love Hayley Williams and everyone. I love their songs, fashion and etc. I love how Hayley doodles or customize her shirt during their concerts. Yeah, I love HAYLEEEY *U* Insert fan-girl face here [*u*]

To start, here's the materials needed:


Step 1: Stencil your logo to the white folder. Then cut it out. For the renegade logo, download it here: Renegade Logo *PS: I don't own the logo. I just got it from Google. Just a way to help you out*


Step 2: Place it on the shirt. I placed it in the middle. Stick it with the tape, make sure it won't move and check if there are areas that aren't flat and the stencil should be intact so the paint won't enter the back side of the stencil (LOL. WTF am I saying? Just secure the stencil!) Insert the card board so the paint won't stain the back part of the shirt.


Step 3: Painting time. Paint around the stencil and also the middle. I painted it with my own style. LOL (I feel like an artist or something HAHAHAHA) Just create something from your own artistic side and don't forget to enjoy.


Poor lightning sucks. Sorry T^T \/

Step 4: Dry the paint. TIP: You can use your electric fan / hair dryer in this process if you want faster drying, but if not, just let it dry down. 


Last step: Remove the stencil carefully. And also the illustration board. READY TO WEAR! :) Just make sure you iron it first. The paint will stick longer if you iron it before wearing and washing it.


END OF DIY PROJECT :) Please post your photos and comments about the D-I-Y <3

Nichido Eyeliner Pen Review

Hey guys! So here's a review of Nichido's 24hr Tattoo Effect Eyeliner Pen Review.

How it looks like:

1. Physical Appearance / Packaging 


Here's my checklist for it's physical appearance:
Not Bulky
Makeup Kit Friendly
Small
Not FAT!
✓Can Easily Fit in pockets of the bag

What I don't like:
-- Looks like a normal pen =n=
-- Not appealing
-- I might get mistaken it as a MARKER *U*

2. Next is the Tip:

What I like:
Pointy
Produce enough ink/fluid
Not messy
Glides easily
Not Irritating

What I don't like:
-- Does not maintain the pointy-ness of the tip </3
-- Not for newbies like me </3

3. Waterproof and Smudge-proof Test


Here's the lines you can make with the pen tip. A thin one and a thicker one. It depends on how you want your liner's thickness/thinness that you prefer. =.= Well, I like both so there.

Waterproof:  
Smudge-proof:  

4. 24hr Test
Now, it's time for the 24hr test! :) No, I just tested it for like, 12hrs. During my sleeping and net surfing period. :3 I can't let it stay for 24hrs because I need to take a bath and wash my face so it won't really stay there for 24hrs. I don't wanna get biased here okay? >.< 


 So that's how it looks like >.< Minutes after the application. The color is actually jet black and it's really nice *O* for the color I'll give 5 stars!     ★. It's not glittery :3

Here's the judgement!


The liner is very unnoticeable small specs can be seen :( So I conclude it's not really going to stay for 24hrs not unless if you retouch it all over again. Here's a more close up photo.
I look like a zombie. :)) No it didn't give me the BLACK EYE feeling, it really stayed in my upper eyelids, it didn't run in my lower lids though some specs can still be seen, because of my tears I guess. I don't scratch my eyes during my sleep, maybe it was caused by my random hugging with my pillows. :)

VERDICT!
The liner is good for everyday purposes. Specially during daytime since it's really black and noticeable. Just to make sure that it'll stay long, just apply some liner again. It's not really heavy :) I also love it for thick lines and winged-style for my eyelids since the tip is actually quite thick to start with.

I just don't recommend it to those who have oily faces and sweat a lot. It's quite waterproof but it can't hold or withstand that much wetness, it'll just run off ._. 


PROS:
Gives that jet-black color
Available locally (in SM dept. stores, Watsons etc.)
Good find for P238.00
It's really handy and light-weight
Can be used for daily basis

CONS:
Not really 24hr lasting liner ._.
It looks like a marker to me (like those pen markers)
Not that waterproof
Not for newbies

All in all: 3/5 Stars  


Please share your thoughts about my review. :) I'd like to know your opinions too <3

Sunday, May 19, 2013

Korean Cat-ears Headband Tutorial

Hey Guys! This will be my very first post and tutorial here in my blog. So please read it <3 Please send me feedbacks too, comments and suggestions are also welcome. *u* Thank you!

Enough for the introduction (LOL). Want to look cute or ulzzang? Or maybe look like these popular Korean girls/girl group like Sulli from F(x). It's very easy to make, but if you're lazy to do it yourself or you lack creativeness or art/DIY skills, you can always buy one. I'm not discouraging you guys :'( so please, don't hate me for those reasons nor am I advertising products here -n-. 

Credits to GOOGLE :)

So here are the materials we need in order to make your Nekomimi (Japanese word for Cat = Neko, Ears = Mimi so Cat-ears = NEKOMIMI. Lol, so it's nihonggo time!) LOL, you might get confused because this is a Korean fashion tutorial yet I inserted Japanese words for this. *Sorry, I always inject my "japanese" side in everything ._. No, I'm not Japanese too. I just love Jap-culture <//3*


  • Old headband
  • Metal Wires (at least 12inches = 1ruler)
  • Glue gun and Glue sticks
  • Ribbon (2 yards. Color of your choice)
  • Patience and enjoyment *u*


Steps on how to do it.
1. First, cut your metal wire for about 6 inches. *This depends on how big or small your ears' length to be.*  Make 2 pieces of me. I forgot to take a photo of the 2 straight wires so I'll post a diagram instead. Then after that, fold it in half and shape it to your desired cat-ear shape. Leave some excess at the end of the wires because it will be the part to be glued on the headband. Here's the photo.


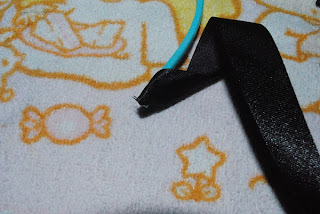
2. Place the metal wires on the headband, make sure that you put it in the higher part of the headband so it will be noticeable. :) Don't put it too high because it'll look like devil horns >.<


3. Pre-heat your glue-gun so it'll be ready for the sticking process. When it's ready, put a small amount in the head band, with same size of the wire, see the photo for reference, then put the wire over it. Repeat this step until all the ends of the wire are glued to the headband. *Careful! The glue-gun is hot, so if you need help don't hesitate to ask someone to help you with this. :) *


4. After sticking everything in, place a black ribbon at the end/edges of the metal wire. *Question: Why do we need to do that? Answer: IMO, I do this so the gluestick and metal wire won't be visible. Sometimes, even though you already covered it with black ribbon, some stubborn glue and metal wire would stick out. >.< But if you don't think it'll show up, you can skip this part :D*


5. Put a small amount of gluestick at the end of the headband then stick the ribbon. This is the start of the covering process. Roll the ribbon from the end, going up the metal wire until you covered up the whole headband. REMINDER! If you go straight to the metal wire, you will end up leaving the spot beneath the wire uncovered. In order to cover it, just start another covering process at this part. *I have a horrible explanation [.-.] Just read the step 6 to understand it </3*

6. This part was uncovered because I went straight to the metal wire rather than covering first the whole headband. *Q: Why didn't you covered the whole headband first before doing the metal wire sticking process?? A: I dunno, because it'll be faster? NAAAH. :))))* I did it so the headband won't be thick because of the ribbon =.= and the glue and metal wire would just mess it up if ever I did some mistakes >.<


7. After you covered everything, just put another amount of glue at the end of the headband to make sure that the ribbon will stay in place. :)
8. TAKE A LOT OF PHOTOS :) 

That's the end of the tutorial. Hope it helped and give you a lot of ideas. Please send me some of your photos. <3 Thank you~