Wednesday, May 22, 2013

DIY Paramore Renegade Shirt

Here's another DIY project specially to those PARAMORE FANS \m/

I was inspired to do this shirt right after I watched Paramore's concert here in the Philippines (Thrilla in Manila 2). I love Hayley Williams and everyone. I love their songs, fashion and etc. I love how Hayley doodles or customize her shirt during their concerts. Yeah, I love HAYLEEEY *U* Insert fan-girl face here [*u*]

To start, here's the materials needed:


Step 1: Stencil your logo to the white folder. Then cut it out. For the renegade logo, download it here: Renegade Logo *PS: I don't own the logo. I just got it from Google. Just a way to help you out*


Step 2: Place it on the shirt. I placed it in the middle. Stick it with the tape, make sure it won't move and check if there are areas that aren't flat and the stencil should be intact so the paint won't enter the back side of the stencil (LOL. WTF am I saying? Just secure the stencil!) Insert the card board so the paint won't stain the back part of the shirt.


Step 3: Painting time. Paint around the stencil and also the middle. I painted it with my own style. LOL (I feel like an artist or something HAHAHAHA) Just create something from your own artistic side and don't forget to enjoy.


Poor lightning sucks. Sorry T^T \/

Step 4: Dry the paint. TIP: You can use your electric fan / hair dryer in this process if you want faster drying, but if not, just let it dry down. 


Last step: Remove the stencil carefully. And also the illustration board. READY TO WEAR! :) Just make sure you iron it first. The paint will stick longer if you iron it before wearing and washing it.


END OF DIY PROJECT :) Please post your photos and comments about the D-I-Y <3

Nichido Eyeliner Pen Review

Hey guys! So here's a review of Nichido's 24hr Tattoo Effect Eyeliner Pen Review.

How it looks like:

1. Physical Appearance / Packaging 


Here's my checklist for it's physical appearance:
Not Bulky
Makeup Kit Friendly
Small
Not FAT!
✓Can Easily Fit in pockets of the bag

What I don't like:
-- Looks like a normal pen =n=
-- Not appealing
-- I might get mistaken it as a MARKER *U*

2. Next is the Tip:

What I like:
Pointy
Produce enough ink/fluid
Not messy
Glides easily
Not Irritating

What I don't like:
-- Does not maintain the pointy-ness of the tip </3
-- Not for newbies like me </3

3. Waterproof and Smudge-proof Test


Here's the lines you can make with the pen tip. A thin one and a thicker one. It depends on how you want your liner's thickness/thinness that you prefer. =.= Well, I like both so there.

Waterproof:  
Smudge-proof:  

4. 24hr Test
Now, it's time for the 24hr test! :) No, I just tested it for like, 12hrs. During my sleeping and net surfing period. :3 I can't let it stay for 24hrs because I need to take a bath and wash my face so it won't really stay there for 24hrs. I don't wanna get biased here okay? >.< 


 So that's how it looks like >.< Minutes after the application. The color is actually jet black and it's really nice *O* for the color I'll give 5 stars!     ★. It's not glittery :3

Here's the judgement!


The liner is very unnoticeable small specs can be seen :( So I conclude it's not really going to stay for 24hrs not unless if you retouch it all over again. Here's a more close up photo.
I look like a zombie. :)) No it didn't give me the BLACK EYE feeling, it really stayed in my upper eyelids, it didn't run in my lower lids though some specs can still be seen, because of my tears I guess. I don't scratch my eyes during my sleep, maybe it was caused by my random hugging with my pillows. :)

VERDICT!
The liner is good for everyday purposes. Specially during daytime since it's really black and noticeable. Just to make sure that it'll stay long, just apply some liner again. It's not really heavy :) I also love it for thick lines and winged-style for my eyelids since the tip is actually quite thick to start with.

I just don't recommend it to those who have oily faces and sweat a lot. It's quite waterproof but it can't hold or withstand that much wetness, it'll just run off ._. 


PROS:
Gives that jet-black color
Available locally (in SM dept. stores, Watsons etc.)
Good find for P238.00
It's really handy and light-weight
Can be used for daily basis

CONS:
Not really 24hr lasting liner ._.
It looks like a marker to me (like those pen markers)
Not that waterproof
Not for newbies

All in all: 3/5 Stars  


Please share your thoughts about my review. :) I'd like to know your opinions too <3

Sunday, May 19, 2013

Korean Cat-ears Headband Tutorial

Hey Guys! This will be my very first post and tutorial here in my blog. So please read it <3 Please send me feedbacks too, comments and suggestions are also welcome. *u* Thank you!

Enough for the introduction (LOL). Want to look cute or ulzzang? Or maybe look like these popular Korean girls/girl group like Sulli from F(x). It's very easy to make, but if you're lazy to do it yourself or you lack creativeness or art/DIY skills, you can always buy one. I'm not discouraging you guys :'( so please, don't hate me for those reasons nor am I advertising products here -n-. 

Credits to GOOGLE :)

So here are the materials we need in order to make your Nekomimi (Japanese word for Cat = Neko, Ears = Mimi so Cat-ears = NEKOMIMI. Lol, so it's nihonggo time!) LOL, you might get confused because this is a Korean fashion tutorial yet I inserted Japanese words for this. *Sorry, I always inject my "japanese" side in everything ._. No, I'm not Japanese too. I just love Jap-culture <//3*


  • Old headband
  • Metal Wires (at least 12inches = 1ruler)
  • Glue gun and Glue sticks
  • Ribbon (2 yards. Color of your choice)
  • Patience and enjoyment *u*


Steps on how to do it.
1. First, cut your metal wire for about 6 inches. *This depends on how big or small your ears' length to be.*  Make 2 pieces of me. I forgot to take a photo of the 2 straight wires so I'll post a diagram instead. Then after that, fold it in half and shape it to your desired cat-ear shape. Leave some excess at the end of the wires because it will be the part to be glued on the headband. Here's the photo.


2. Place the metal wires on the headband, make sure that you put it in the higher part of the headband so it will be noticeable. :) Don't put it too high because it'll look like devil horns >.<


3. Pre-heat your glue-gun so it'll be ready for the sticking process. When it's ready, put a small amount in the head band, with same size of the wire, see the photo for reference, then put the wire over it. Repeat this step until all the ends of the wire are glued to the headband. *Careful! The glue-gun is hot, so if you need help don't hesitate to ask someone to help you with this. :) *


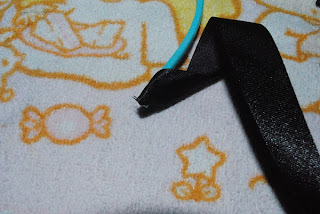
4. After sticking everything in, place a black ribbon at the end/edges of the metal wire. *Question: Why do we need to do that? Answer: IMO, I do this so the gluestick and metal wire won't be visible. Sometimes, even though you already covered it with black ribbon, some stubborn glue and metal wire would stick out. >.< But if you don't think it'll show up, you can skip this part :D*


5. Put a small amount of gluestick at the end of the headband then stick the ribbon. This is the start of the covering process. Roll the ribbon from the end, going up the metal wire until you covered up the whole headband. REMINDER! If you go straight to the metal wire, you will end up leaving the spot beneath the wire uncovered. In order to cover it, just start another covering process at this part. *I have a horrible explanation [.-.] Just read the step 6 to understand it </3*

6. This part was uncovered because I went straight to the metal wire rather than covering first the whole headband. *Q: Why didn't you covered the whole headband first before doing the metal wire sticking process?? A: I dunno, because it'll be faster? NAAAH. :))))* I did it so the headband won't be thick because of the ribbon =.= and the glue and metal wire would just mess it up if ever I did some mistakes >.<


7. After you covered everything, just put another amount of glue at the end of the headband to make sure that the ribbon will stay in place. :)
8. TAKE A LOT OF PHOTOS :) 

That's the end of the tutorial. Hope it helped and give you a lot of ideas. Please send me some of your photos. <3 Thank you~